Wednesday, June 23, 2010

Miss Henny's Wild Ride


     Miss Henny has had a challenging life. Not the usual kind of born-in-the-ghetto story that you're expecting, but rather a life plagued by misunderstanding and the lack of acceptance that follows bookish girls who skip a grade. Except, paired with a heavy dose of dumb in place of the bookishness. But don't worry - we can still craft this into a makeover story.
     She was given to my friend Kate along with 6 other unsexed chicks as an Easter present. Later, after many mornings of countless crows, it became obvious that Henny was the only lady in the group and also that having 6 roosters sucks. So Kate made plans to drop all the birds off to be processed. Around the same time, Henny laid her first egg.


     Keeping a single hen through the winter didn't make much sense, and killing her right as she began to lay was also an odd choice. So, we offered to take her in, as we had just lost Miss Meatloaf to a bad case of "sorry we had to break your neck." These things happen. Henny was bigger than our birds, the only one with a full beak, about six months younger, and by far the most beautiful. She was doomed. The girls picked on her and at her for quite some time, and she seemed pretty sad. Plus, she always wore a smirk when I would pet the other girls as they 'assumed the position' for a rooster. She had gone way beyond heavy petting, and frankly, life at our place was boring. Having transferred from public school to a private all girls school, I related to her pain.
     For much of the time that we had Henny, she was able to roam the yard freely. Free ranging chickens are at their happiest - they forage for worms, bugs and greens, and most importantly they leave all that petty BS back in the coop. Kind of like having a reprieve from mockery during school breaks when everyone is too busy having fun to care about how big a loser you are. Miss Henny was actually doing ok. But when summer came and all of the gardens in the neighborhood got planted, we had to lock the girls up again. Miss Henny slid back into a lethargic trance only worn by the most far gone of social outcasts. She wouldn't leave the (unfertilized) eggs and barely ate. She was broody.
   Around this time I spoke with my friend Kristine, who is a caretaker on the island directly across from our shoreline with her husband, Tim. Together, we've been keeping a beehive on the island. She was waiting for a break in the weather so that she could boat in and get some more laying hens since hers were starting to slow. And that's when Miss Henny's future flashed before my eyes. And she was slightly more popular. 


     On this particular weekend, my parents and uncle were visiting and my nephew and brother and law were also around, entered in the LCI Fishing Derby. My dad, who grew up working on the family chicken farm, volunteered to manhandle Miss Henny into her cage. We all decided to make the trip together.


     Jack carried her down to the dock to wait for Kristine while Josh fished. Miss Henny really didn't have much to say at any point during this adventure, but usually she's a loud, high-pitched squawk-chirper.


     It was a windy, choppy, yet beautiful day for a boat ride. Jack put a nightcrawler in the cage with Henny, but she just sat on it. She seemed numb to the whole affair.
     After we docked and unloaded (we had some bee maintenance to deal with) we packed up a cart that Kristine was towing behind an ATV - I sat on the back while my family found room in the cart.


     Kristine's dogs followed us everywhere we went - Jackson even has his own seat in front the windshield.


     Our trip to the barn included a view of the garden, and a visit with the alpacas.


     And then, it was time. Henny needs to spend a few days in a cage in order to protect her form all of the 'mean girls in the lunch room' per se- but then she'll have a lot more space and freedom, as well as the love of a rooster.


     Her new family includes some birds who look a lot like her - Buff Orpington/Black Star mixes, as far as I know.


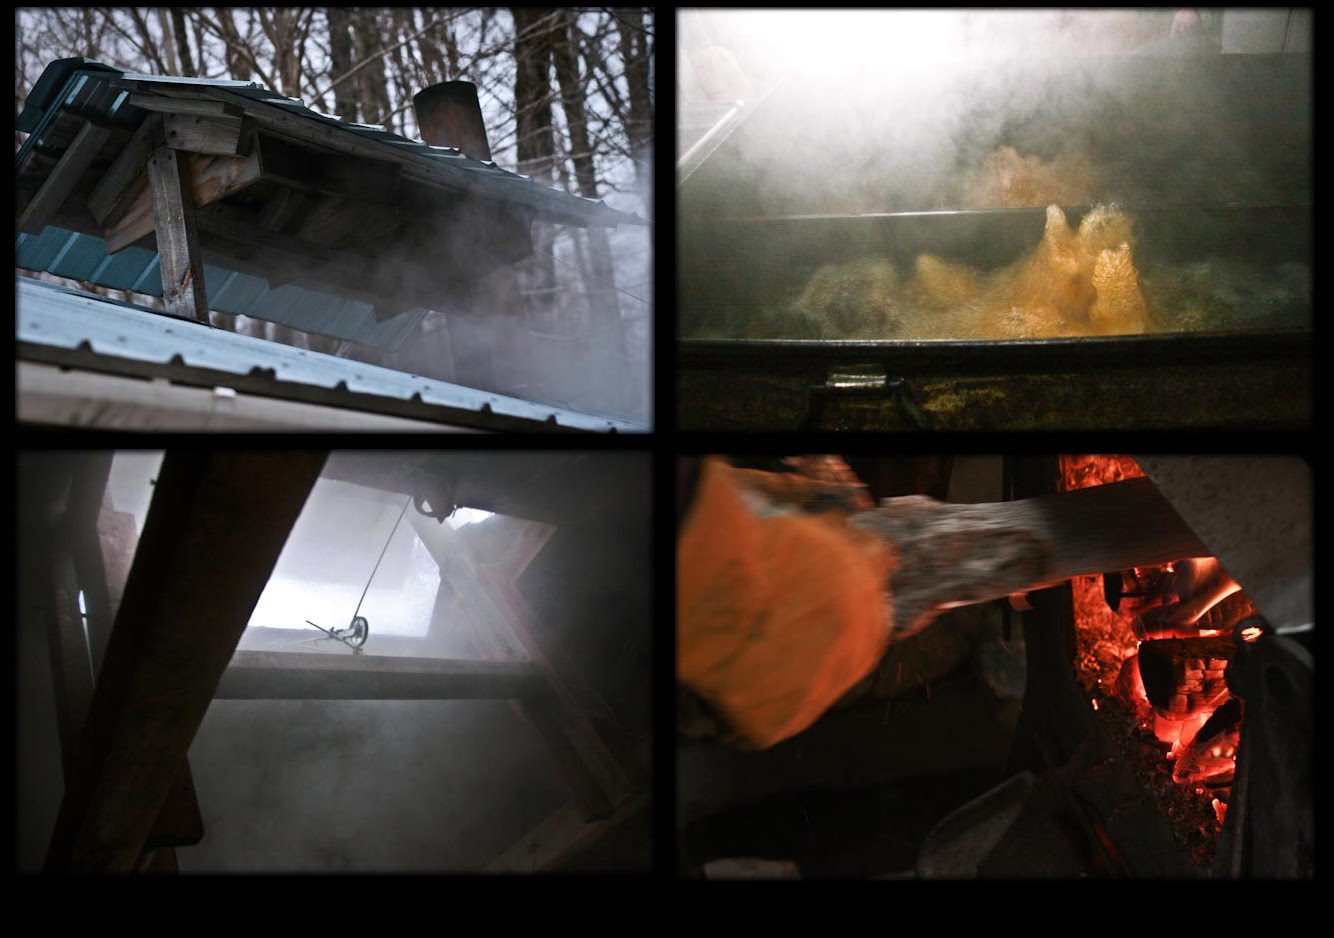
     No pictures of our bee tasks - sorry! I'm sure my mom took some, and maybe I'll insert them later. Needless to say, it was a great tour, and we saw lots of amazing sights. Solar panels, cisterns, a beautifully constructed log cabin - it is truly an inspirational place.
     Back at the dock, Jack and Josh were still fishing. They caught 23 fish at Savage Island, and 45 for the day. But sadly, they did not 'catch the big one.'


     And then, just like that, it was all over. Miss Henny was gone. She was the funniest chicken I've known, but I was usually laughing at her, and not with her (not like Miss Rita, now there's a clever girl.) I'm kind of looking forward to seeing her again, and that in itself is a makeover of sorts. ??
     So, until Kristine comes to get me, or I patch the rest of the holes in our canoe, I'll just have to wait.  My biggest hope is that she becomes a mother - she really likes to sit on eggs.

Friday, April 23, 2010

Get Your Slow Blog Button Here!

   Slow Blogging is a term that has surfaced a few times on the internet - maybe you've even heard of it? You can read the original Manifesto by Todd Sieling here, which I find remarkably well stated. Similar to the Slow Food movement, the concept is that some things are improved upon by a slower, more thoughtful approach, and that the opposite mindset (i.e.; fast food) can inspire rather ill consequences for both bloggers and readers. Together, with all of these weekly, daily, and hourly posts, we are fueling a pace to life that feels beyond our control and often times void of true substance.


  Of course, Slow Blogging can hold very different definitions for all of us. We might each admire the idea for varying reasons and institute our own pace. Some Slow Bloggers post just a few times a year, others monthly, and some of us can't keep any sort of noteworthy regular schedule. You might feel that within your community, weekly and daily posts are considerably slower paced than your peers - feel free to define Slow however you like. In my mind, it is simply a rejection of any sort of expectation. You are a person, it is your life, and you should share what you like when you like without feeling obligated to anyone - even yourself
   My exploration of this topic has surfaced one constant theme: Slow Blogs have very few readers. This seems to be an unavoidable fact, and it may be enough to make some bloggers steer clear of the whole affair, especially if they are attempting to earn profits through advertising. Maybe in addition to re-thinking the pace of blogging, we could also be re-thinking our methods for gaining value from the blogs we write. Your blog may not earn you any monthly income, but it may eventually assist you in reaching other life and professional goals;  therefore, you might consider keeping it clean - void of fluff, junk, and anything else that reveals you to be a last-minute, I'll just throw something together individual. Just sayin'.
   Something else that I've noticed is that other than Todd Sieling's Manifesto and a NY Times article, there is not a lot of readily available information out there. Unless you search 'Slow Blog' you're unlikely to come across the concept. Although the idea has been discussed briefly here and there, it really hasn't been popularized to the level that I think it deserves. So, my solution has been to create a button that bloggers can publish on their sites, notifying readers that Slow Blogging is a concept the author subscribes to. Hopefully, it will spread from blog to blog (admittedly a pipe dream via my 32 readers) but wish me luck.
   If you would like to publish the Slow Blog button (illustration by Katya Andrievskaya) on your site, simply copy the html code below and paste it on your blog. I will compile specific instructions below the code for anyone who needs more direction. And feel free to share your stories and opinions! I will happily expand upon this post with your words - together we might build something beautiful.

<a href="http://artfulgreens.blogspot.com/2010/04/get-your-slow-blog-button-here.html" title="Artful Greens"><img src="http://www.vtsandwichgarden.com/images/slow_blog.jpg" border="0" alt="Slow Blog Button" /></a>

To publish this button on Blogger, copy the code, and then 'add a gadget' under 'customize.' Select HTML/JavaScript, and paste the code in the box. It is not necessary to title the gadget. Save and view to see your new button.
I am not experienced in other blog publishers, but hopefully we can get the correct information up for anyone who might need help with Wordpress, etc...


A little Wordpress help from Piet, July 13, 2010:

Hello,
I like the idea.... However the button is a JPEG and hence has no transparent background (surrounding) but white only. I made a GIF version with transparent background. The usage is the same in WorldPress.
Is it okay to use it in this way ?

P.s. The GIF is on my site and better for my performance. You can copy it from there if you want.
Thanks, Piet


Tuesday, March 30, 2010

Mountainside Maple Sugaring


     My father-in-law is a retired engineer who spends the majority of his time at his mountain retreat, hunting, fishing, and working hard to prepare for sugaring season. I wish I could tell you more about how hard he works repairing lines, fighting with the weather, and chopping wood. A better kid would know and might even offer to help. Somehow he still smiles when we he gives us our yearly gallon, and black fly season aside, I think he enjoys his time alone in the woods.

Dave's design/build sugar house

     You must've heard by now that mountain living is bit different from your standard country living. Loretta Lynn still gets airtime, right? Well, there's no electricity here, although some people have wind turbines and solar panels, as well as gas lights. We're talking outhouse life. Roads turn into trails that are only accessible with snowmobiles or skis in the wintertime, and everything becomes impassible as the  mud takes over in the springtime. School bus deer camps, cooking kettles hanging from chains, huge deer fences around gardens, and the steady hum of buckshot. Paradise or Hell, depending.

Beaver dams abound up here

A house down the mountain; I think I want to live here. Those black dots make up a sweet little container garden that got blown over in the high winds. Notice the covered bridge over the creek bed. Perfect place to sleep.

     This was my second trip up to camp this season. The first time the sap wasn't running because the nighttime temperatures were too high (sap runs best when the nights are cold and the days are warm.) This time around we had a different issue; a recent cold snap froze all of the sap in the tank, and although we were expecting the weather to warm up, the wind really kept things in check. We had to thaw the sap with boiling water so that the boiler would fill before dark.


   A web of sap lines work their way down the sugar bush to the mainline that fills this outdoor tank. From the inside of the sugar house, the quantity of sap in the tank can be read right through a window. My father in law keeps excellent records of the sap flow, sugar content, weather conditions and overall quantity and quality of syrup. Mostly he writes it on the walls inside the sugar house. The building is designed with a vent that opens via a hand crank, allowing the steam to escape. (My mother used to boil sap in our kitchen, until she ruined the walls - all for about 1/2 cup of syrup...)


     As soon as the sap began flowing freely from the outdoor tank into the boiler, it was time to fire up the stove. Maple syrup is 66 % sugar, and this sap was about 2.5 %. At 2 %, it takes 43 gallons of sap to produce one gallon of syrup. The higher sugar content meant that less sap would be needed - about 34 gallons per one of syrup.
     On a cold day like this one, it's really nice to be in the sugar house as it turns into a sweet smelling sauna.


     For all of that water to boil off takes a really long time. You're supposed to drink beer, I think. Personally, I could take pictures all day long without ever getting bored, but my nephew was losing his ten year old mind. My mother -in-law had told me that years ago everyone would boil hotdogs in the sap for lunch as well as eggs, which I brought along. Jack would've killed for a hotdog as he has no use for eggs. But he did peel one. There's a pond right outside the door that we were able to cool the eggs in, and then we stored them in the snow so that they couldn't float away. I thought they might have a hint of maple sweetness to them, but no such luck, they were pretty ordinary.


     The egg trick did not take much time. Severe boredom began to set in. Even the dog was bored. Jack and Georgia shared 2 cups of snow to pass the time.


     And then, it all happened. And by this I mean very slowly, and after a really long time. The sap began to thicken, and we all tried to stay out of the way while Dave made a draw. If you've ever made jelly or candy, you'll know about that visible moment when the liquid has evaporated enough water to change the sugar content and begin to congeal. You really have to master instinct and timing to recognize when to act, or else you'll get it all wrong. If you overdo it you can taste a smokiness in the syrup, aka: Bean Syrup. Only good for making baked beans.

     You may know that syrup is graded, and often times it continues to darken in color and gain a stronger maple flavor over the course of a season. This is usually weather related and is not set in stone. This year, for the first time ever, my father-in-law's total take was comprised of more than half 'Fancy' or Grade A Light Amber. I don't even remember the last time I tried Fancy, and I don't know anyone who buys it. But we have a whole entire gallon, and it is wicked, wicked good.

Fancy on the left, then medium amber and dark amber

     All of the syrup passes through a filter before being graded and packaged. This particular batch was Grade C, and therefore went into a 5 gallon bulk container for cooking. Most likely, whatever is left of the season up here will also produce Grade C, and after this container is full, Dave will call it quits.


     We finally made it to the good part. Sugar on Snow. Followed by shots of syrup. And then a long, bumpy car ride home.


    Here are our favorite things to do with maple syrup:
  • slushy spoonful out of jar from freezer 
  • drizzled over spoonful of peanut butter
  • mixed with cocoa powder on the stovetop to dip fruit in
  • pan fry tempeh in oil, then add a glug of syrup and a dash of soy sauce at the end to make a glaze
  • toss with carrots, salt, and a little oil before roasting
  • maple baked beans, good feta cheese, homemade bread, and salad = my favorite dinner
  • maple apple butter, maple pumpkin butter, maple sweet potato butter
  • thinned syrup with cardamom/ginger over fresh berries 

Sunday, March 14, 2010

Ode to Green Smoothies


In college I wrote an assigned speech about Vinny Barbarino, which was (if you'll please pardon my bragging,) a smash hit. You'd think this would encourage me to boldly continue on proclaiming my adoration for whatever I want, whenever I feel, but truthfully I'm much more inclined to the Haiku. Not so much skilled as inclined. My favorite traditional Japanese Haiku is by Matsuo Basho c.1689:

Not knowing
The name of the tree,
I stood in the flood
Of its sweet smell.


That one gets me a bit weak in the knees, in a romance for nature kind of way. Moving on to human nature and modern  Haiku, Jack Kerouac wrote in 1959:

All day long
wearing a hat
that wasn't on my head.

Who can't relate to that? But now, thanks to my assuming post title, I'll share something with you that tells you everything I feel about Green Smoothies, in 17 syllables or less:

heart of a monkey
gas station shopper
blends best guess.

Several years back I randomly began reading this raw vegan blog - I think I was looking for a salad dressing recipe. It was my first blog and I still read it, as somehow it's evolved into this can't-put-down novel for me. Quirky cast of characters and all. Regardless, I became really interested in Raw Foods and began experimenting. For the sake of making an enormously long story short - I cannot be a raw foodist; my throat itches all of the time, and the majority of the recipes involve foods that come from nowhere near where I live, which interests me zero. But I did come away with some valuable ideas and recipes. 

Green smoothies are fruit smoothies which include greens, hidden deep down in a landslide of fruity taste. Kale, spinach, chard, purslane, beet greens, lambsquarters - and all you'll ever taste is fruity goodness. Victoria Boutenko, a well known raw foodist, wrote a fantastic book called Green for Life complete with theory, data, recipes, and all things green smoothie related. The premise here is that we need to eat a motherlode of greens - but we don't. We've evolved to enjoy other tastes, and sitting down to bowl after bowl of greens is not manageable for most people. So, she's devised a way to sneak them in - like how mom's grate apples and sweet potatoes into those Mickey Mouse pancakes. Although totally undetectable, eventually you might start to crave the taste of the greens, advancing on to recipes that feature them more than hide them.


My go to green smoothie recipe includes strawberries and blueberries from my freezer (still frozen,) a handful of any kind of greens, and apple cider. If there's any bitterness, I add maple syrup. I also like romaine lettuce mixed with melon and ice. And I'm not opposed to throwing in a banana now and again, but usually my taste buds equate bananas to baby food, especially when they're pureed. I use a Vitamix Super 3600 which I bought off Ebay and have grown to love. I feel similarly emotional about the Vitamix as I do my pets; our time together is bound to be shorter than I can stomach. Later, I found the same model fortuitously underpriced in a Florida thrift store and bought it for back up. Vitamix blenders have high powered motors and the ability to reverse the blade motion, but no matter what you use it's really important to macerate the greens to smithereens, as hiding the taste is only so good if the texture remains chewy. Plus, greens in your teeth is not what we're going for here...


I'm embarrassingly behind on planting for Spring. I normally would've planted the hoop house in February, but instead I went on a road trip for 2 weeks. Of course, life is always changing, and I have to go away again before I can plant. So, for now, I'll buy my green smoothie greens, but I assure you that they are the sweetest when they are home grown.

Sunday, March 7, 2010

A Sad Day for Bees....


   I have been on the road for 2 weeks, visiting family and friends and taking lots of photos. My brain is about to explode from everything that I've experienced - which was entirely the point. Although I'm thrilled to share my new ideas and images, I'm also way behind on the home front. A broody hen, taxes, a hoop house to plant, propaganda to design...everything awaits.
   While I was away I got word that my bees were flying over at the Blue Heron Farm. This news was hugely relieving as last year 2 of my hives were split in half, with the new hives being comprised of brand new equipment. This means that partway into the season I had 2 hives facing a lot of work, just to make it through the winter. With new equipment, bees are responsible for drawing out enough wax (imagine honeycomb) to raise brood and store food. To make things worse, it started raining a lot, and that prevents bees from obtaining the calories and supplies they need to 'make it all happen.' In the fall I was definitely concerned about the strength of certain hives and began feeding them sugar syrup until it got too cold. {If any of you are interested in keeping bees, I recommend that you explore Beekeeper Linda's blog, and consider reading Ross Conrad's book Natural Beekeeping.}


   I was unsure if the bees would really be ready for food, but last year when the sun starting coming out more often, the farmers noticed ravished bees in their chicken feed. I decided to make a big batch for my 6 hives, so that I would have lots to take me through the warming weather. I mix sugar and water 1:1 and cook it on the stovetop until the mixture is clear. I then allow it to cool and pour it in a 5 gallon bucket with a honey gate (the yellow plastic mechanism has wingnuts that allow you to control the speed in which the spout opens and closes. I've found that it works pretty spectacularly when canning things like ketchup, too.) I happen to have a lot of food service jelly jars from my waitressing days to use as feeders for the bees; after filling with sugar syrup, I screw on lids with holes drilled out in a pattern that mimics the shape of the hole in a hive's inner cover. The jars get turned upside down and sit atop slats of wood positioned over the inner cover, inside a medium super. This allows space for the bees to come up and get the food, and gravity controls the flow. I covered the jar lids with duct tape for the ride over to the farm.


   I was greeted at the farm by Adam and Christine's chickens aka 'the Pretty Girls.' Because mud season is upon us, I brought a sled to pull all my stuff to the bee yard, instead of trying to drive back there. On a side note, we don't have a rooster at our house, and today I saw my first chicken love. Chicken porn? Call it what you will, but yikes either way...
 

    I used to differentiate my hives just by color, but that soon went by the wayside. Eventually they became all mixed up because my schedule means that everybody 'gets what they get'; be they bee, chicken, niece, nephew, or husband. I thought about numbers, letters, or stencils, but then I found these Wizard of Oz stickers for 99 cents. Sold. There are 8 different images, making them within my price range (bees can get expensive if you don't keep your head.) I unsuccessfully set out a hive last summer to try and catch a swarm, and that one is labeled with the Wicked Witch. Heh, heh...


When I got to the bee yard, I was disappointed to find that only one of the hives seemed to be active. Strangely, this was the hive I had written off as the weakest of the bunch last Fall - I was so sure it would fail. I lifted the covers on the rest and didn't hear any buzzing. I've never lost a hive before, which is completely out of the norm, but I feel distraught nonetheless. I'm unwilling to take things apart and investigate until the weather is much warmer, just in case there is a small population still hanging on, tightly clustered in the center of the hive. This is wishful thinking, I assure you. But when I do go back to clean out the hives, I'll be able to see what happened to the bees - I suspect that they starved. Their death is undoubtedly a regular result of keeping bees in northern climates; Vermont has not seen Colony Collapse Disorder, or at least that is the position of the Vermont Beekeepers Association. This seems to make sense as we don't have a lot CCD stress factors, such as monoculture, overused pesticides, and hives that are trucked great distances (as you'll find at California almond groves, for example.)


   So, a sunny, depressing day. And I have about 35 pounds of sugar syrup! That's a lot of lemonade to make...

Sunday, February 21, 2010

Growing Apple Chairs

     We have this thing at work, which I'll call 'Mandatory Pie Break.' It takes place at any time of day in any room, and again, it's mandatory. That's how committed we are to enjoying and comparing local pies, usually apple. We live in what feels like the Apple Capitol of Vermont (complete with an annual Apple Fest on Columbus Day weekend) and apple pies are like knishes on Coney Island or cheesesteaks in Philadelphia; everyone has their local favorite. MPB was really inspired by our need to find a new pie, as Celia Hackett of Hackett's Orchard in South Hero finally closed down her famous pie operation after 35 plus years. People are freaking out.


     Because it's such a small town, I cannot rightly share with you our results. Let's just say that we've found a hands down winner (although nowhere near as good as a Hackett's,) and are also enjoying 'off - Island' pies in secret. There have been some occasional homemade entries between us, which brings me a little closer to the heart of this post. To celebrate Riki's return from Japan, I made a special apple coffee cake from 101cookbooks

glazed with homemade apple jelly 

steaming hot

     Maybe you know a bit about the genetics of apples; I'm a Michael Pollan fanatic, and was inspired to learn more about them after reading the Botany of Desire. The basics are that apple seeds do not produce offspring that resemble the trees in which they come from. A Mac doesn't make a Mac, and a Granny Smith doesn't make a Granny Smith. This unreliability is the basis of why apples are cut and grafted as opposed to started from seed (that and the ability to pair each tree to the proper rootstock for it's desired size and the local climate.) Apples from seed are rarely sweet, nor can their resistance to disease and pests be counted on. 
    This bit of information puts the home gardener in a pay-to-plant situation. You're unlikely to plant apples from seed on your property unless you can be sure that they will produce a variety that's to your liking. Purchasing grafted 'whips' (unbranched 4-6 ft trees on bare rootstock) can run about $12 - $20 apiece, or more for older and better established trees. Really, that's not bad. However, if you're like me, and have some zany projects in mind, then all of those numbers start to add up before you've accidentally killed your first tree.

McIntosh Seeds

     I have two books in my library that inspire me to do all sorts of crazy things with trees; Arborsulpture by Richard Reames and How to Grow a Chair, again by Reames and Barbara Delbol. Both of these books are fascinating accounts of different existing arborsculptures, as well as instructions for growing fences, chairs, and even houses. Arborsculpture is a term coined by Reames that encompasses his process of treeshaping, which relies on whips that are instantly shaped. The Gradual Shaping Method was developed by Peter Cook and Becky Northey and uses small saplings, like those I intend to grow from the apple seeds. Gradual tree shaping requires planning and design to slowly shape the tree into the desired form.

Garden Chair from Pooktre Tree Shapers


Peter Cook on the Garden Chair:


"Our living garden chair started life as a single tree under 10in (20cm) tall. We had planned out the design before the tree had even start to grow. The tree was grown into the design shape over a 3 year period. We waited about 6 years before we sat on it. So it was about 9 years old. This coming spring it will be 13 years old, it is a wild plum (Prunus Myrobalan). This tree now needs no more maintenance than that of the average fruit tree in your garden."

Be sure to follow the link to their site to see their photo gallery and subscribe for updates!

     I'm not sure exactly what I'd like to do with treeshaping - I imagine that to start I'd just play with things on a small scale for container plantings and photographs. But what I do know is that without starting the seeds, I'd actually have to buy whips - and as I'm not planning on eating any of the fruit (we have already planted enough,) so why bother? With all of this in mind, I removed the seeds from my coffee cake apple scraps and stored them in the fridge until I was ready to plant.


Later, I added seeds from a Mutsu (aka Crispin) as well as both Bosc and Anjou pears. I had a Northern Spy as well, but it had no seeds!? This time, after removing the seeds I dried them out in the oven (mine can be set at 100 degrees) as I read that this was an important step. I had lent my dehydrator to a friend, but I think that would have really sped things up. If you're using either an oven or a dehydrator, I would be careful not to go above 110 degrees if you'd like your seeds to germinate.


And then, just like that, I set them up for Winter Sowing as I had done recently with several other seeds. You could also keep them in your refrigerator for a few months if you prefer. I, myself, am not too worried about failure (with regards to experimental gardening.) I am so busy in the summer that when I screw things up it usually amounts to nothing but sweet, sweet relief.

Sunday, February 14, 2010

Digital Pinhole


My motto, as it applies to photography, is: 'use your brain, not your wallet' (I wish these words applied across the board in my life, but that's not always the case.) I think I had spent my lifetime budget on photography by about 1997, mostly on darkroom supplies, and long before being exposed to the expenses of the digital realm. As I began to see the benefits of changing over to digital, I made a deal with myself that I would keep it creative and low budget, especially to remind myself that I was supposed to be in total control of the process. My first step was a cheap negative scanner, which allowed me to stop spending long hours in the darkroom getting fixer in my hair.  I spent a lot of time playing with toy cameras, homemade pinholes, and making masks inside the camera while I traveled around. Such an enjoyable cure for boredom. I remember checking into a motel to develop a bunch of film on my way from New Orleans to Houston in a town called Sulfur; bad place to need to use a lot of water.  

Holga photo 2003, Italy

Holga with a mask taped inside; I shot the bottom half of the film roll of lily pads while canoeing, and then rewound the film, flipped the mask over, and reshot the same roll. This time I exposed only the top half of the roll, shooting cow feeders at a dairy farm.

and a homemade pin-holga shot in Plymouth, Vermont

the shutter on a Holga is bound to fail sooner than later; I just made the broken cameras into pinholes  that used remove-able velcro as a lens cap

But here we are today, in 2010, and I am finally and truly finished with developing film, as well. I even tried replacing developer with instant coffee for a time to try and break away from all those chemicals, and guess what - it smells totally putrid! Much worse than a dairy farm and a subway station on the hottest day of summer combined. I'm pretty happy with the digital world, but I like to keep my contributions to the process relevant, which can be challenging. In just about a week I'm headed to Florida to visit my family, and most of what we'll do there is take pictures. I know that keeping myself totally entertained on a lengthy birding trip with my dad means having a special photo technique at the ready (even if I'm not paying great attention to the birding part.) This year, I made sure to make a digital pinhole body cap before leaving. Body caps can be ordered online, and you can probably find a generic version at your local camera store, but don't expect that it will be cheaper. 

first, you need to drill out a hole through the center of the body cap. I opted to hold the center to a flame, and then shoved a fondue fork through before it cooled. Sloppy, sloppy work, but much faster than setting up to drill.

next, I cut a small square of doubled tinfoil to place the pinhole in. First of all, aluminum foil is not the choicest material, but it's what I could find. When making the hole, place your hand over the top of the needle (you may want to wrap tape around the top so it's easier to hold in place) and spin the foil around in circles until you've broken through the tip. You're not trying to push the whole needle through.

Needles come in varying sizes, and I'm lying if I tell you that I understand this. I will tell you that no employee of a chain sewing store has ever been able to explain it to me, but regardless, the packages are clearly marked in the 'notions' aisle. I cannot even tell you for sure if the numbers go up or down according to diameter, I've read it both ways from so many sources (not just the internet.) It's like the time 2 different chiropractors told me to wear a lift in opposing shoes. The sewing world seems to say one thing and the photo world another. Could I get to the bottom of this? Sure, probably, but I know that small is what I'm going for. The whole concept is that the farther your 'film plane' (digital sensor) is from your pinhole, the larger the hole needed; digital slrs are thin in comparison to the wooden box pinhole cameras that are available. I think your best bet is to measure the needle diameter on a ruler, and record those measurements. The hole that you create is your aperture, and it is fixed. After creating this hole, you can only vary your results through the amount of available light and the length of your exposures. If the hole is too big, the focus of your photos will suffer, like so:

aperture (pin hole) too big in my aluminum foil - number 14 needle

You could determine an exact aperture for your pinhole after attaining the focal length and  consulting a pinhole aperture chart. You'll also need a basic understanding of the corresponding needle size, but rest assured, what you're looking for is small. I need a pinhole of around .29 which as far as I can tell needs about a number 13 needle. The truth of the matter is that you mostly need patience to keep repeatedly testing and experimenting, and getting to know each altered body cap. 

This time around I found my supply of copper sheeting (craft stores carry this) which holds the hole much better than aluminum foil. The colored pencil markings on the body cap are not actually marking center, but were helpful for me while I was melting the plastic.

 I also glued a piece of black construction paper with a hole punched through it over the copper to help decrease any excess light pollution. Here's where I ended up:

apple


potatoes

clementines

I noticed some pros and cons right off the bat:
  • obviously, it's great that you can see the image right away and make adjustments - that's tops.
  • my xti has a Bulb mode (shutter stays open as long as you're pressing the button, which is an undeniable drag when you're on your 20th 3 minute exposure) but no Time mode ( push shutter once to start the exposure and again to end it.) Apparently, the remote control that Canon sells works as though in Time mode. On the plus side, Bulb mode has a digital clock to watch. If you taped something over the shutter to keep it depressed, you could just uncover and cover the pinhole when you're ready to expose. Velcro tabs, a book, etc...
  • I can see flecks on the image where dust has gotten through the hole and fallen on the sensor. For $50 you can buy a manufactured pinhole bodycap that uses an opaque film over the hole to eliminate this problem.
  • so much cheaper than a macro lens.
  • vertical shots need a tripod, as most digital cameras don't have a flat side on either short end. 
  • again, holding the shutter down sucks - listen to music or the radio, and make sure that you're in a comfortable position. A minute is forever if you having nothing else to pay attention to.
The good news is that Florida is likely to be brighter, and my exposures will be shorter. I need a smaller needle to try a tighter aperture, as the focus still wasn't great.  Also, I can't find an image to show you, but my favorite camera that I made had an irregular, rough hole and I loved it. I'd like to try to intentionally  influence some different shapes for this one. I think that the spinning method keeps the pinhole cleaner, so maybe I'll go back to the quick, violent stab.
Related Posts with Thumbnails